Dockerize MedusaJS Components: Optimize and Deploy Your Application

Today, I say "Hi Medusa!”.
Recently, I received a request from my director. It involves developing an e-commerce product for a retail business client group. They require a customized solution for self-deployment in their environment.
The requirement is for an e-commerce source code that I and teammates can customize, and add features to meet the needs of each customer. After researching through various open-source platforms such as WooCommerce, Vendure, Saleor,... we decided to choose MedusaJS.
Introduction
What is MedusaJS?
MedusaJS is a set of commerce modules and tools that allow you to build rich, reliable, and performant commerce applications without reinventing core commerce logic. The modules can be customized and used to build advanced e-commerce stores, marketplaces, or any product that needs foundational commerce primitives. All modules are open-source and freely available on npm.
Learn more about Medusa’s architecture and commerce modules in the Docs.
Why containerize Medusa applications?
The benefits of dockerizing an application, specifically Medusa, are manifold:
- Set up development environments swiftly: With Docker Compose, you can set up your development environment with just a few commands. For instance, cloning source code, creating a
.envfile, and runningdocker-compose up -d. - Deploy easily in the cloud or on-premises: Once you build your Docker images, you can run them consistently on any server environment. It also helps you automate your application deployment and version management.
- Ensure scalability and flexibility: Dockerized applications are easier to scale and expand. By using Docker Swarm or Kubernetes, you can automatically scale the number of application containers to meet user demand without the need to reconfigure infrastructure.
Prerequisites
Some packages we need to install before proceeding further in this post.
Docker & Docker Compose
Visit the official link below and download the version that corresponds to your environment.
Docker Desktop: The #1 Containerization Tool for Developers | Docker
Node or NVM
Visit the official link below and download the version that corresponds to your environment.
Node.js — Download Node.js® (nodejs.org)
I suggest you install version 18 or greater because:
- Backend Admin needs Node v16+
- Storefront needs Node v18+
Or install nvm instead to install any version of NodeJS
curl -o- https://raw.githubusercontent.com/nvm-sh/nvm/v0.39.7/install.sh | bash

# Or
wget -qO- https://raw.githubusercontent.com/nvm-sh/nvm/v0.39.7/install.sh | bash
If your environment is Windows, you may like this one
Git
Visit the official link below and download the version that corresponds to your environment.
Medusa CLI
To install the Medusa backend, you need Medusa's CLI tool.
npm install -g @medusajs/medusa-cli
Once done, check the version using this command:
medusa --version
![]()
Create Medusa Backend
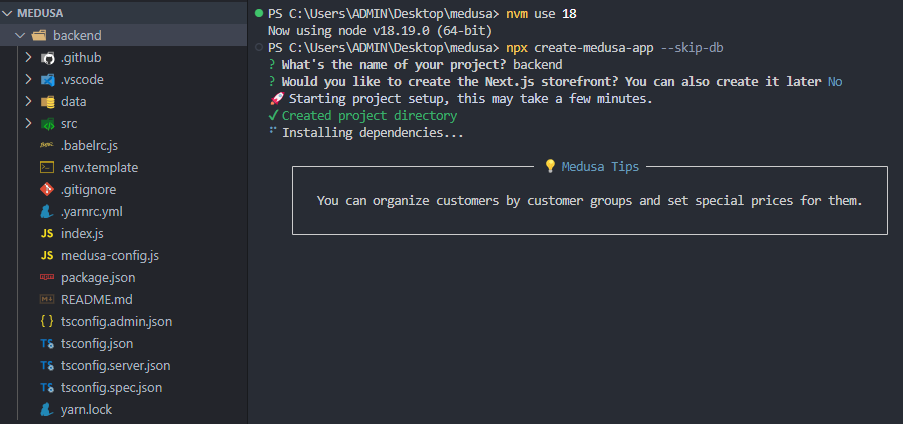
We can easily create the backend with the following command:
npx create-medusa-app --skip-db
I use the —skip-db option because I will have a different setup later.
Now wait a moment…
Create Medusa Storefront
Create a new Next.js project using the Medusa starter Storefront:
npx create-next-app -e https://github.com/medusajs/nextjs-starter-medusa storefront
Containerize Medusa application
Backend
First, create the develop.sh file with this content and place it in the /backend folder.
#!/bin/bash

medusa migrations run

medusa $1
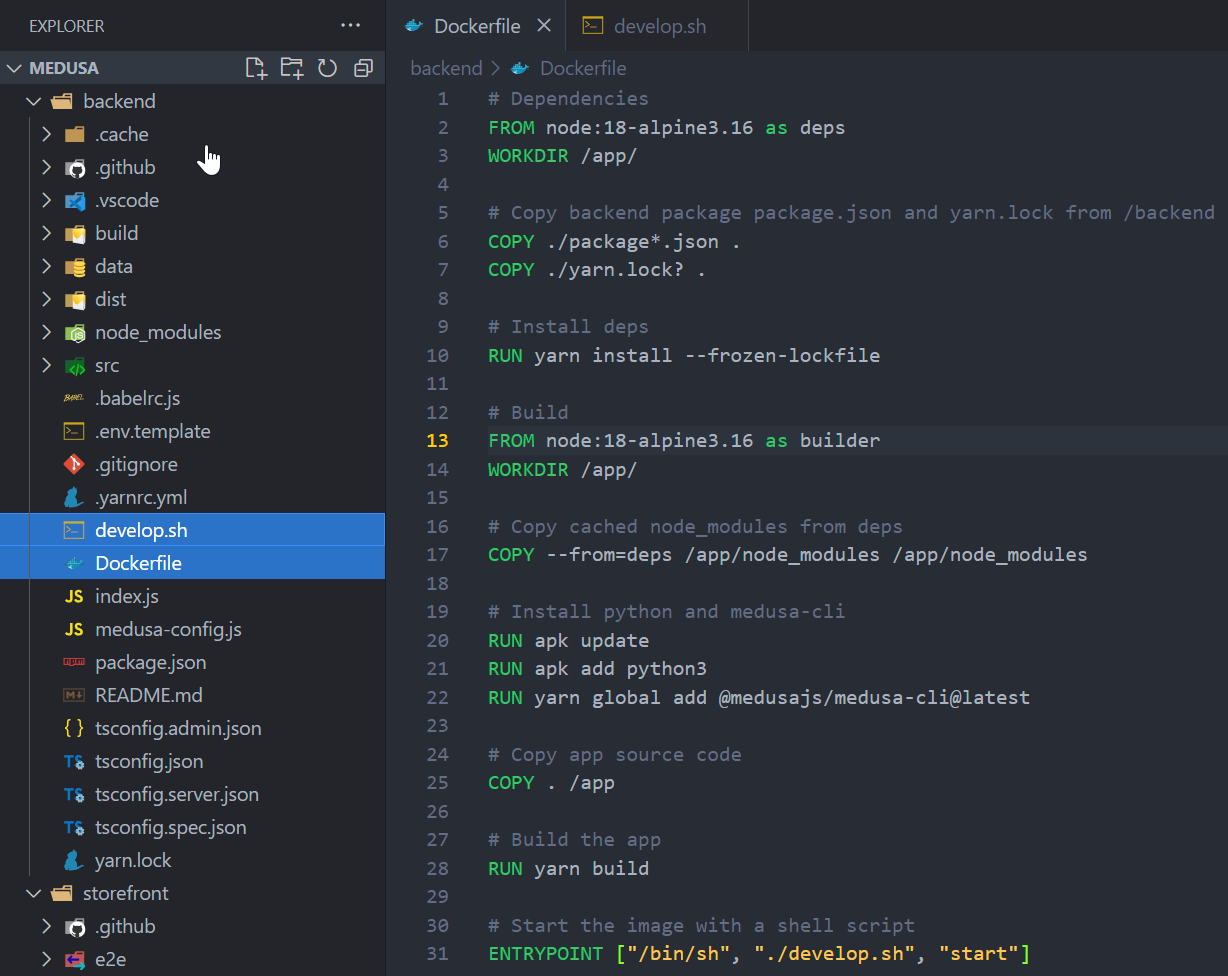
Next, create a Dockerfile with this content in the same directory as in the previous step.
### Dependencies ###
FROM node:20-alpine as deps
WORKDIR /app/

# Copy backend package package.json and yarn.lock from /backend
COPY ./package*.json .
COPY ./yarn.lock? .

# Install deps
RUN yarn install --frozen-lockfile

### Build ###
FROM node:20-alpine as builder
WORKDIR /app/

# Copy cached node_modules from deps
COPY --from=deps /app/node_modules /app/node_modules

# Install python and medusa-cli
RUN apk update
RUN apk add python3
RUN yarn global add @medusajs/medusa-cli@latest

# Copy app source code
COPY . /app

# Build the app
RUN yarn build

# Start the image with a shell script
ENTRYPOINT ["/bin/sh", "./develop.sh", "start"]
The result:
Admin UI
According to the announcement, the admin UI source code has been moved into the core repository since version 1.8. So, we won't have the source code to build the Docker image anymore.
Wait, hold on…
When you run the command medusa develop, the admin UI will build static javascript and HTML files into the /backend/build directory, so we need to copy it and serve it with nginx.
A small note is that if you deploy it in production, you can configure it not to build the admin UI. Splitting it into two separate Docker images is the approach I'm currently taking. Check this one.
First, create the admin.nginx.conf file with this content and place it in the /backend folder.
server {
    listen 80 default_server;
    server_name localhost;
    charset utf-8;
    root /usr/share/nginx/html;

    location / {
        try_files $uri $uri/ /index.html =404;
    }
}
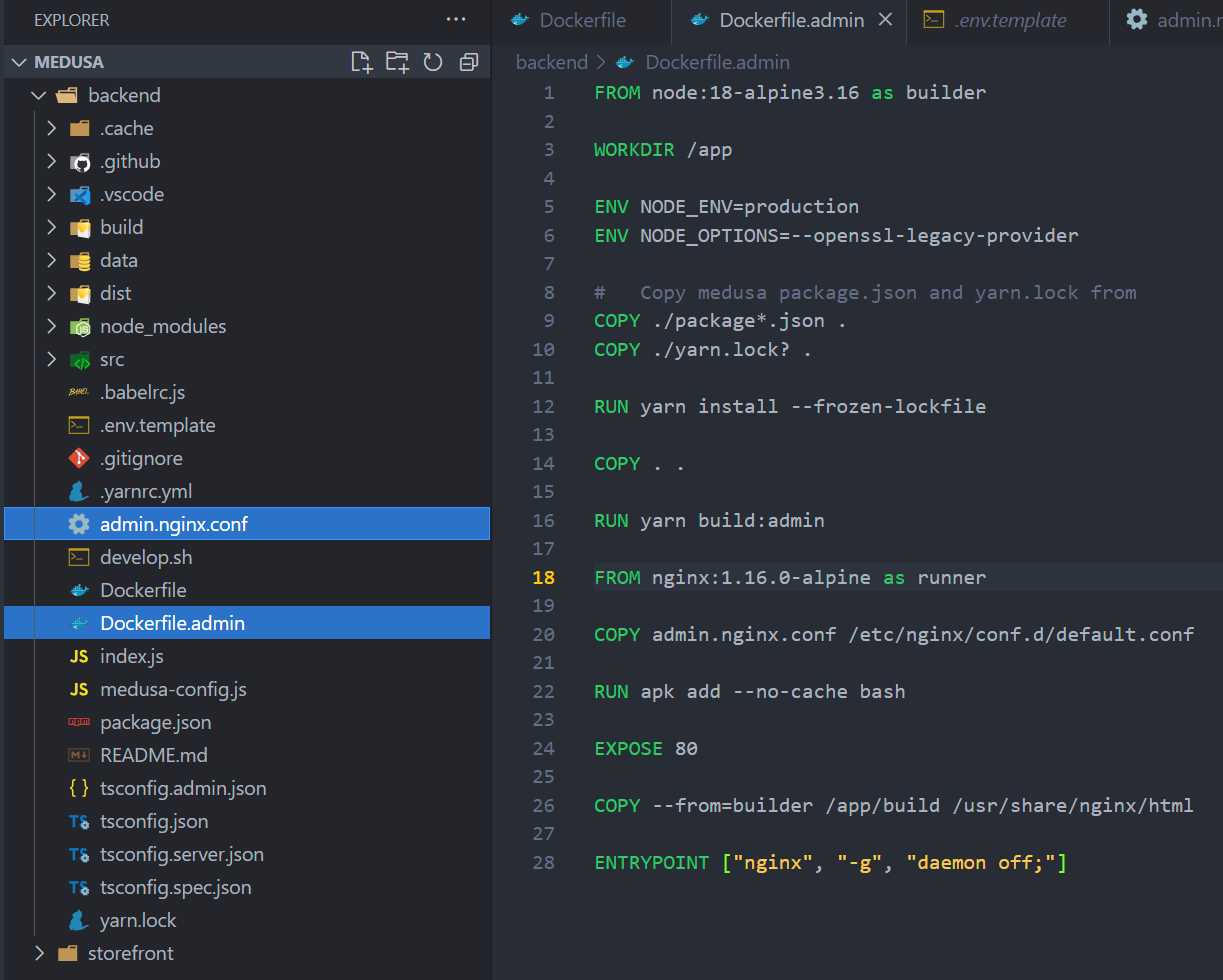
Next, create a Dockerfile with this content in the same directory as in the previous step.
### Build ###
FROM node:20-alpine as builder
WORKDIR /app

ENV NODE_ENV=production
ENV NODE_OPTIONS=--openssl-legacy-provider

# Copy medusa package.json and yarn.lock from /backend
COPY ./package*.json .
COPY ./yarn.lock? .

# Install deps
RUN yarn install --frozen-lockfile

# Copy app source code
COPY . /app

RUN yarn build:admin:prod

### Runner ###
FROM nginx:1.16.0-alpine as runner

# Copy nginx.conf from /backend
COPY admin.nginx.conf /etc/nginx/conf.d/default.conf

RUN apk add --no-cache bash

EXPOSE 80

# Copy static files from Build stage
COPY --from=builder /app/build /usr/share/nginx/html

# Image entrypoint
ENTRYPOINT ["nginx", "-g", "daemon off;"]
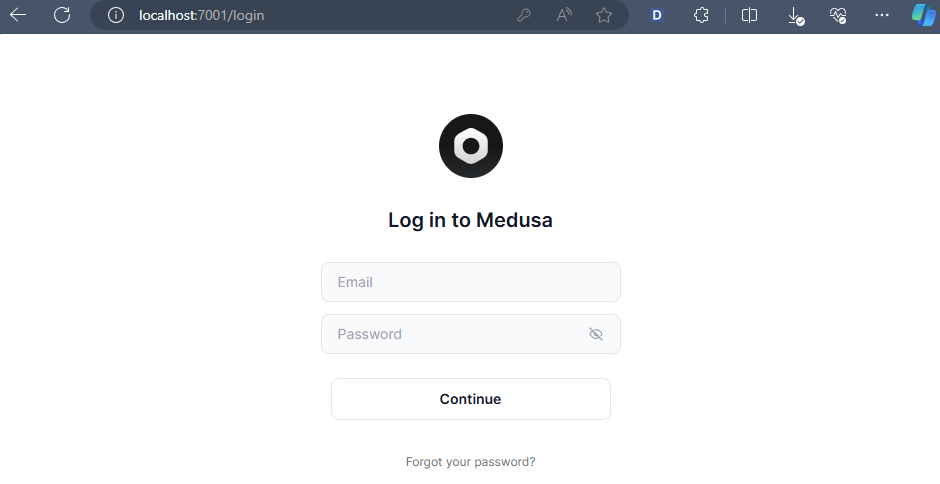
The result:
Storefront
Similar to the components above, we will have the following Dockerfile.
### Dependencies ###
FROM node:20-alpine as deps
WORKDIR /app

# Copy storefront package.json and yarn.lock from /storefront
COPY ./package*.json .
COPY ./yarn.lock? .

# Install deps and launch patch-package
RUN yarn install --frozen-lockfile

### Build ###
FROM node:20-alpine as builder
WORKDIR /app

# Copy cached root and package node_modules from deps
COPY --from=deps /app/node_modules /app/node_modules

# Copy app source code
COPY . /app

# Build the app
RUN yarn build

# Run the builded app
ENTRYPOINT [ "yarn", "start" ]
Manage containers
With the above sections, we are ready to build and deploy the Docker image. Next, I will introduce how I manage the containers and configure them for deployment using Docker Compose.
Manage environment variables
Firstly, we should provide some environment variables for the app. In /backend, create a .env file and paste this content:
JWT_SECRET=something
COOKIE_SECRET=something

POSTGRES_USER=postgres
POSTGRES_PASSWORD=CHANGE_ME
POSTGRES_DB=medusa

DATABASE_TYPE="postgres"
REDIS_URL=redis://redis
DATABASE_URL=postgres://postgres:CHANGE_ME@postgres:5432/medusa
STORE_CORS=/http://.+/
ADMIN_CORS=/http://.+/
AUTH_CORS=/http://.+/
- Check out the documentation https://docs.medusajs.com/development/backend/configurations#environment-variables.
Next, in /storefront, make a copy of .env.template to .env.local. Then change the value of NEXT_PUBLIC_MEDUSA_BACKEND_URL variable to http://host.docker.internal:9000, if you use Windows.
Docker Compose configuration
Let’s create a docker-compose.yml file at the same level as the /backend and /storefront directories.
I declare configurations for the database and Redis as follows:
version: "3.8"
services:
  postgres:
    image: postgres:12
    ports:
      - "54322:5432"
    env_file: ./backend/.env
    volumes:
      - app-db-data:/var/lib/postgresql/data:cached

  redis:
    image: redis
    expose:
      - 6379

volumes:
  app-db-data:
These are the services that must be ready before the application container is initialized and connected to them.
Now I will define the backend and admin UI services.
...
  backend:
    build:
      context: ./backend
      dockerfile: Dockerfile
    image: pxuanbach/medusa-backend
    depends_on:
      - postgres
      - redis
    env_file: ./backend/.env
    ports:
      - "9000:9000"

  admin:
    build:
      context: ./backend
      dockerfile: Dockerfile.admin
    image: pxuanbach/medusa-backend-admin
    depends_on:
      - postgres
      - redis
    ports:
      - "7001:80"
The last service is storefront, it needs to be initialized after the backend service. So, here is its configuration:
...
  storefront:
    build:
      context: ./storefront
      dockerfile: Dockerfile.prod
    image: pxuanbach/medusa-storefront
    depends_on:
      - backend
    ports:
      - "8000:8000"
Launch all services
After configuring the docker-compose.yml file, we will run it to see how it operates.
docker-compose up -d --build postgres redis backend admin

# waiting...
# init seed data (Optional)
docker-compose exec backend yarn seed

# wait...
docker-compose up -d --build storefront
In the above command, I run backend before storefront. Because the storefront needs to fetch the region from the backend to build successfully.
Once done, check the results:
-
Admin Panel: http://localhost:7001
-
Backend: http://localhost:9000/store/products
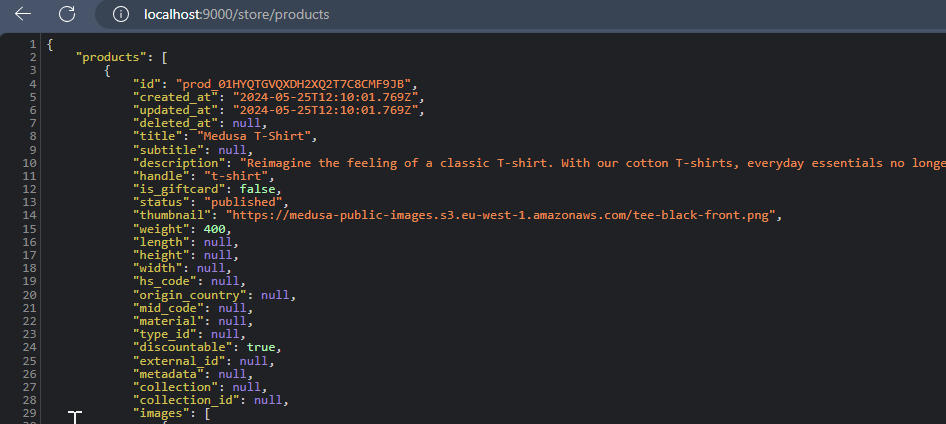
-
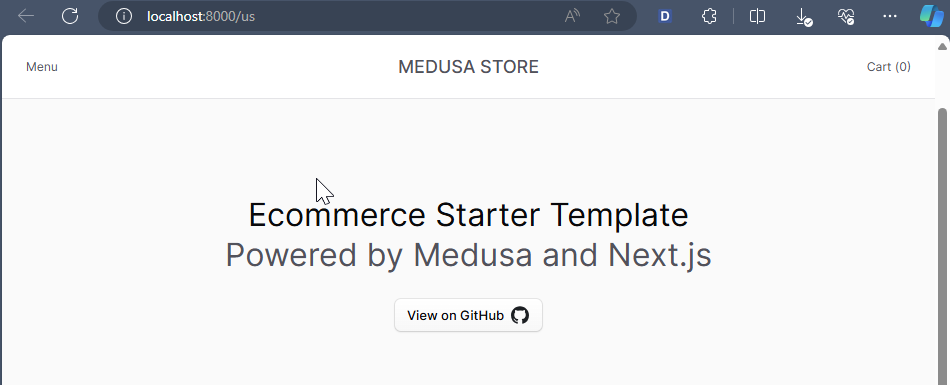
Storefront: http://localhost:8000
Notes:
- If you cannot connect to the Admin Panel or Storefront via Docker container, try changing the default host of each to
0.0.0.0. - Storefront needs to fetch the regions from the Backend. So, you should initialize your Backend data first.
Conclusion
I hope this post was useful. If you need a project to run a demo on your environment, here is my Git repository.
In this repository, I have separated into 2 compose configurations. The configuration of this post is equivalent to prod configuration in the repos. Additionally, I created a script called start-up.sh in the demo repository. It will help us to start all services automatically.